Overview
In this section you are going to see the creation of an Ontimize application from cero using permissions on backend and frontend.
First steps
This tutorial starts using an empty Ontimize application project and it is going to reach final configuration step by step. To see the complete example click the following link.
Configuring the backend
Candidate entity creation
First, we are going to add all stuff related with a Candidate: an entity, a service and the rest controller as you can see here. Then, we will add records to our table candidate on the database. Next step is to create the user candidate on the database and define his permissions and the admin permissions as you can see here. In this example also you can see the tags that we use to secure the application and the methods. We use @EnableAspectJAutoProxy(proxyTargetClass = false) once on the ServerAplication class and @Secured({ PermissionsProviderSecured.SECURED }) on all methods that you want to protect.
com.ontimize.projectwiki.ServerApplication:
@SpringBootApplication
@EnableAspectJAutoProxy(proxyTargetClass = false)
public class ServerApplication {

	public static void main(String[] args) {
		SpringApplication.run(ServerApplication.class, args);
	}

}
com.ontimize.projectwiki.model.core.service.CandidateService:
@Override
@Secured({ PermissionsProviderSecured.SECURED })
public EntityResult candidateQuery(Map<String, Object> keyMap, List<String> attrList)
        throws OntimizeJEERuntimeException {
    return this.daoHelper.query(this.candidateDao, keyMap, attrList);
}
Database records
Here are the rows that we added to our database on each table.
TUSER table: 
TUSER_ROLE table: 
TROLE table: 
TSERVER_PERMISSION table: 
TROLE_SERVER_PERMISSION table: 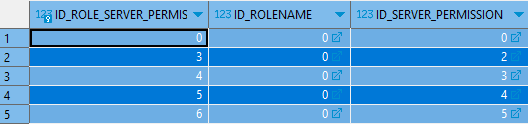
As we can see on the last screenshot the only user that have access to the CRUD operations on the table is the demo user.
Server permissions
Now it’s time to define the server permissions. In our application we have two users, ‘Demo’ and ‘Candidate’. The unique user that we want to have permission to access the candidates table is the ‘Demo’ user. So we will need to define it’s permissions.
Creating the permission service
Previous to define our permissions, we need to create a rest controller with its service to provide the permissions to the frontend.
com.ontimize.projectwiki.ws.core.rest.PermissionRestController:
@RestController
@RequestMapping("/permissions")
public class PermissionRestController extends ORestController<IPermissionService> {

    @Autowired
    private IPermissionService permissionService;

    @Override
    public IPermissionService getService() {
        return this.permissionService;
    }
}
com.ontimize.projectwiki.model.core.service.PermissionService:
@Service("PermissionService")
@Lazy
public class PermissionService implements IPermissionService {

    public final String CANDIDATE_PERMISSION;
    public final String DEMO_PERMISSION;

    private String readFromInputStream(String fileName) throws IOException {
        StringBuilder resultStringBuilder = new StringBuilder();
        try (BufferedReader br = new BufferedReader(
                new InputStreamReader(Objects.requireNonNull(this.getClass().getClassLoader().getResourceAsStream(fileName))))) {
            String line;
            while ((line = br.readLine()) != null) {
                resultStringBuilder.append(line).append("\n");
            }
        }
        catch (IOException e){
            return "";
        }
        return resultStringBuilder.toString();
    }

    public PermissionService (){
        try {
            CANDIDATE_PERMISSION = readFromInputStream("candidate_permissions.json");
            DEMO_PERMISSION = readFromInputStream("demo_permissions.json");
        } catch (IOException e) {
            throw new RuntimeException(e);
        }
    }

    @Override
    public EntityResult permissionQuery(Map<String, Object> keyMap, List<String> attrList)
            throws OntimizeJEERuntimeException {
        Authentication authentication = SecurityContextHolder.getContext().getAuthentication();
        EntityResult e = new EntityResultMapImpl();
        Map<String, String> map = new HashMap<>();
        String role = authentication.getAuthorities().toArray()[0].toString();
        if (role.equals("candidate role")) {
            map.put("permission", CANDIDATE_PERMISSION);
        }
        else if (role.equals("admin")) {
            map.put("permission", DEMO_PERMISSION);
        }
        e.addRecord(map);
        return e;
    }
}
Defining our client permissions
Client permissions are defined by a JSON file (you can find more detailed information here). In this turorial, we are going to create a set of simple preconfigured JSON permission files. Into a real application, this permission object could be retrived from database or created dynamically by code depending on the user, the role, etc. We can see more examples of this files
candidate_permissions.json:
{
  "menu": [
    {
      "attr": "candidates",
      "visible": false,
      "enabled": false
    }
  ],
  "routes": [
    {
      "permissionId": "candidates-table-route",
      "enabled": false
    }
  ]
}
demo_permissions.json:
{
  "menu": [
    {
      "attr": "candidates",
      "visible": true,
      "enabled": true
    }
  ],
  "routes": [
    {
      "permissionId": "candidates-table-route",
      "enabled": true
    }
  ],
  "components": [
    {
      "attr": "candidate",
      "selector": "o-table",
      "columns": [{ "attr": "PHONE", "visible": false, "enabled": false }],
      "actions": [{ "attr": "delete", "visible": true, "enabled": false }]
    },
    {
      "attr": "candidates_form_edit",
      "selector": "o-form",
      "components": [{ "attr": "EMAIL", "visible": true, "enabled": false }],
      "actions": [{ "attr": "delete", "visible": true, "enabled": false }]
    }
  ]
}
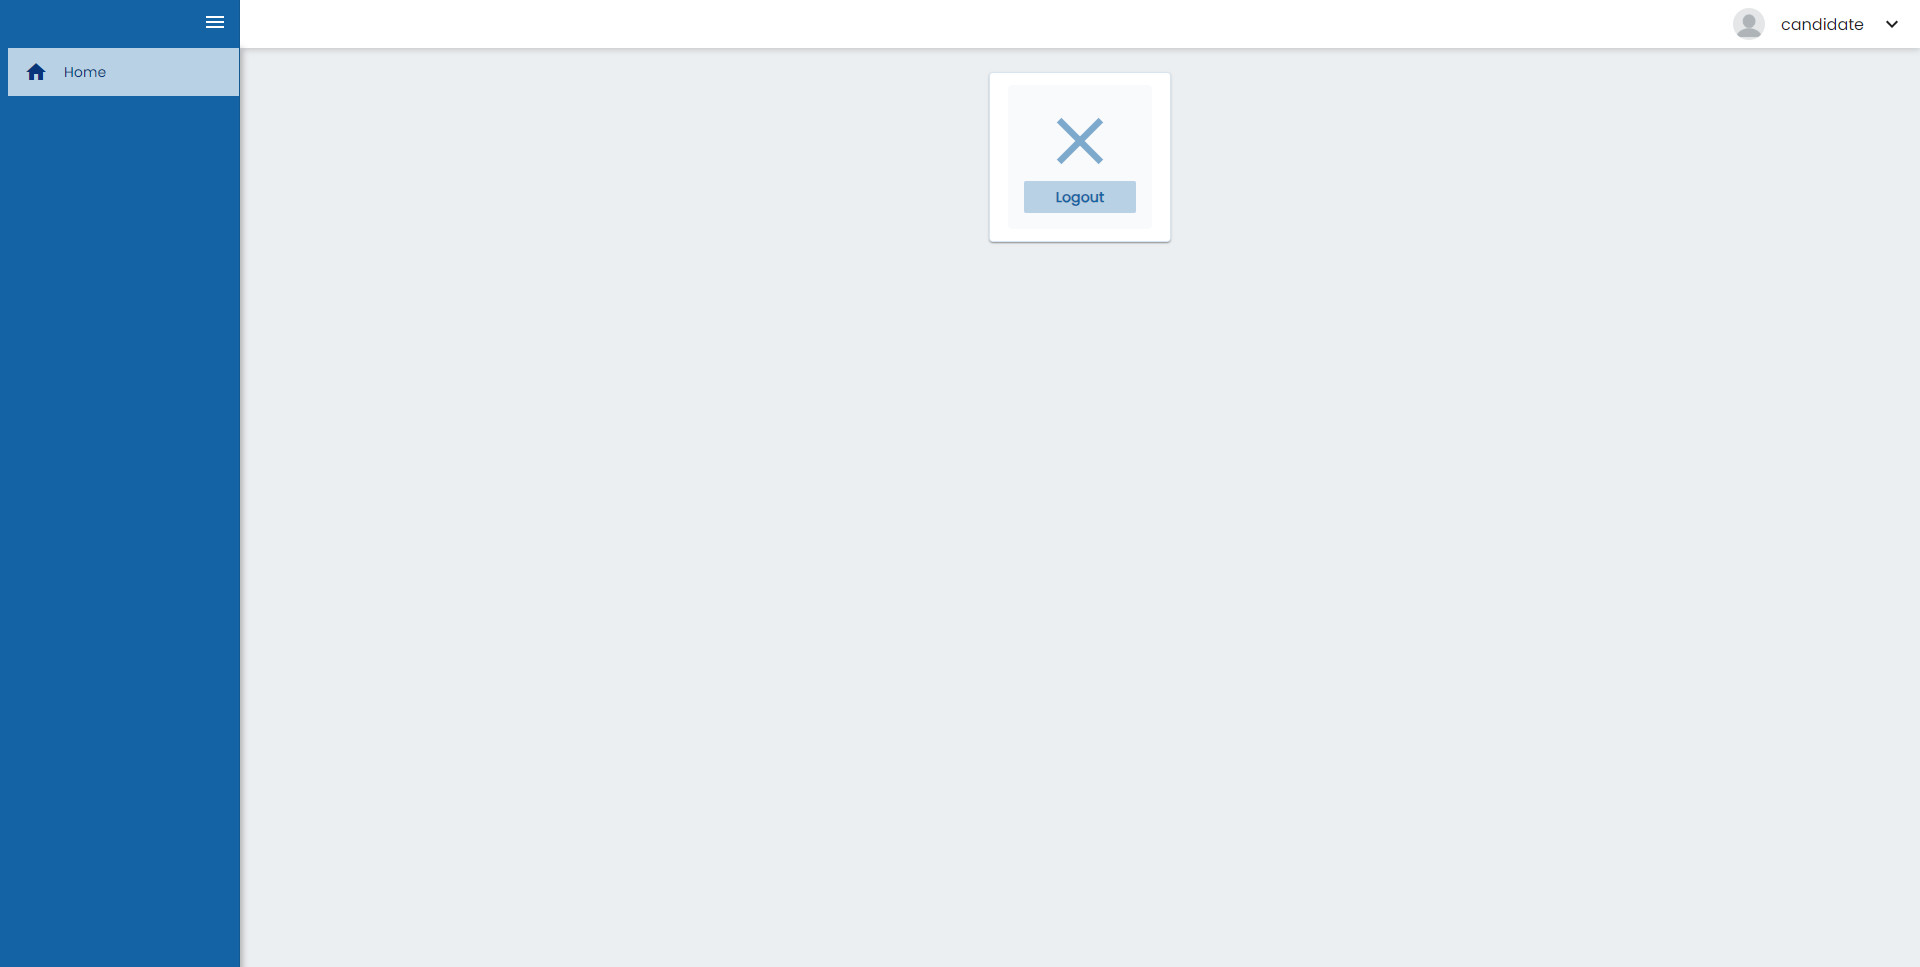
With this permissions if we log into the application with the candidate user we will see the application like this:
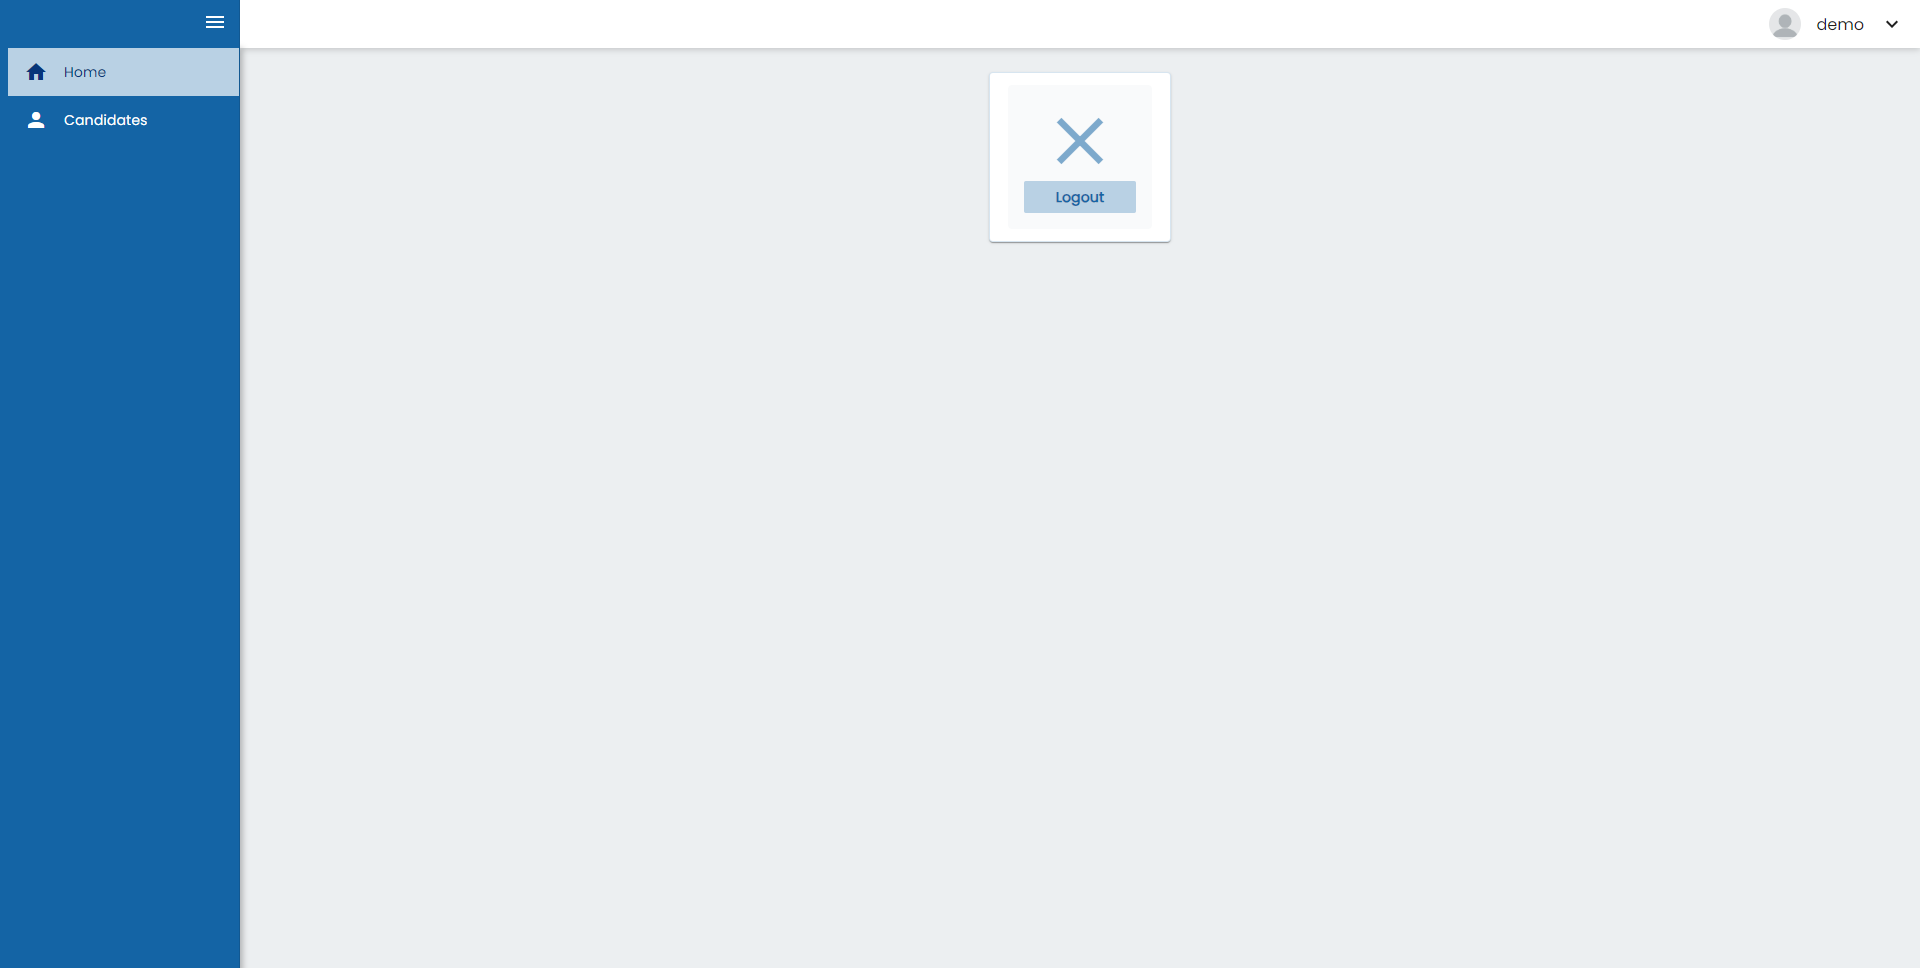
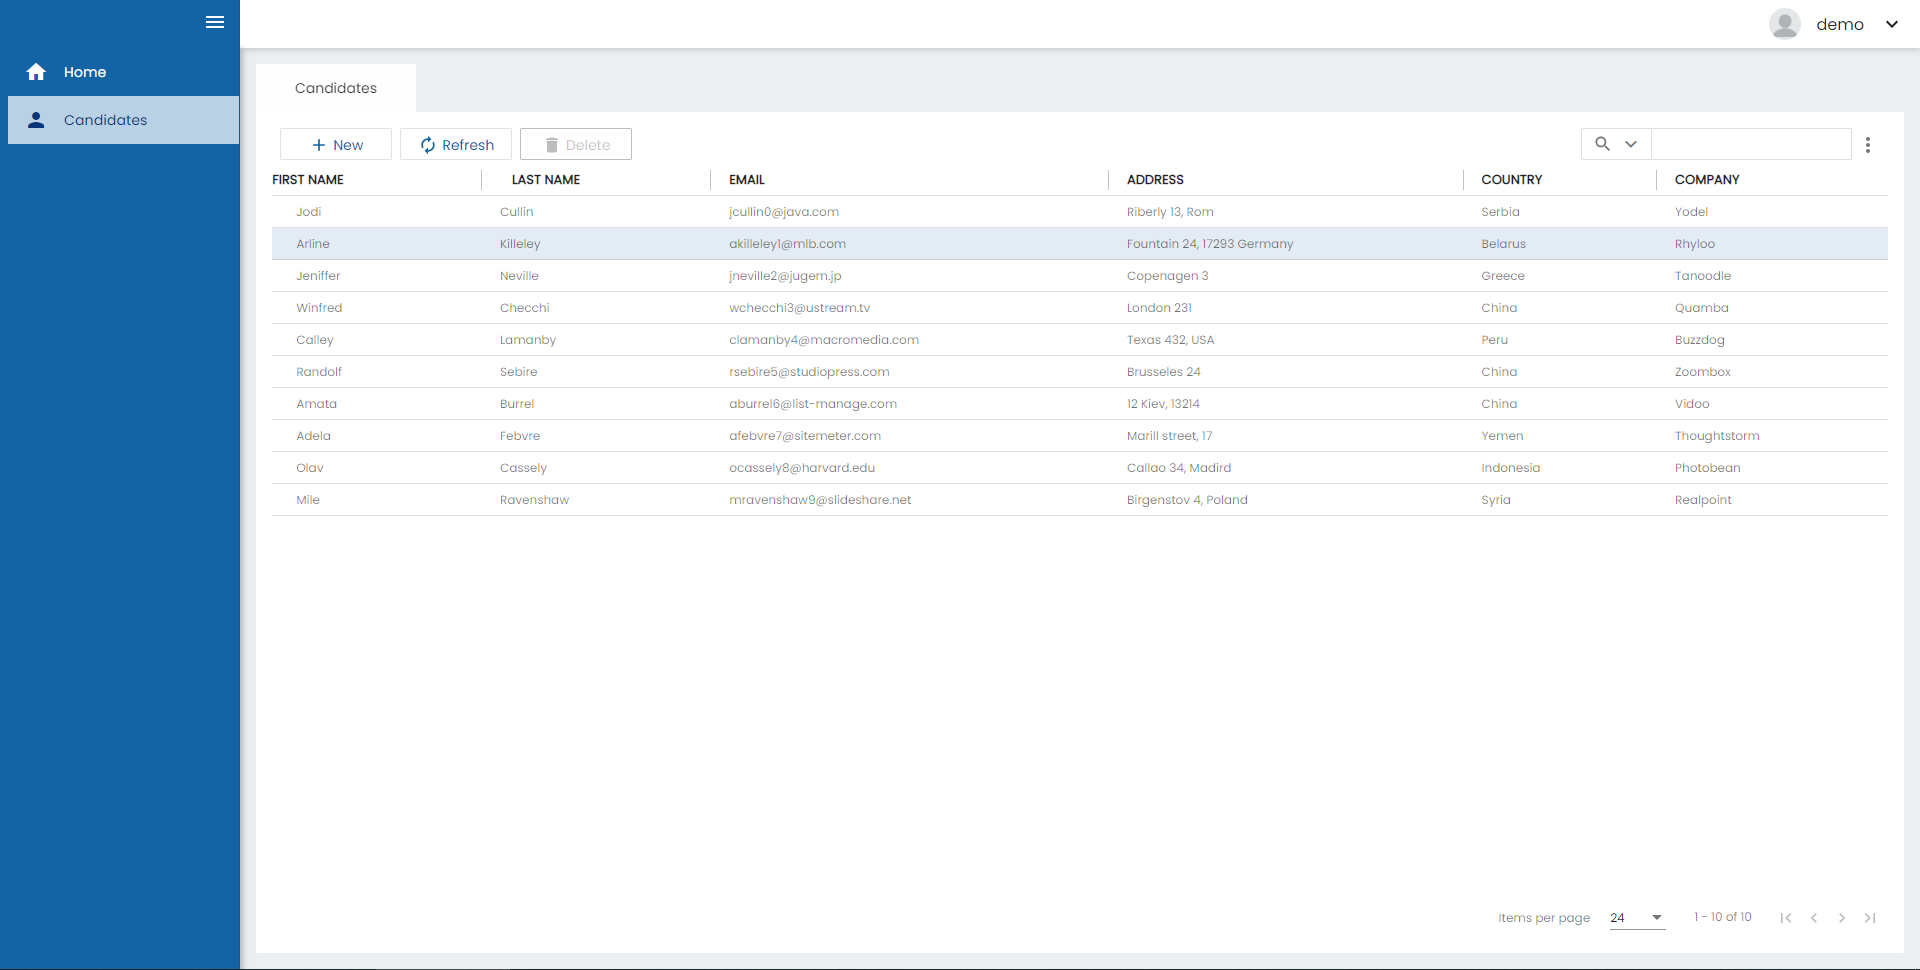
And if we log with de demo user we are going to see a different menu and we can enter to the candidate table:
As we can see the delete button of the table is disabled as we configured before:
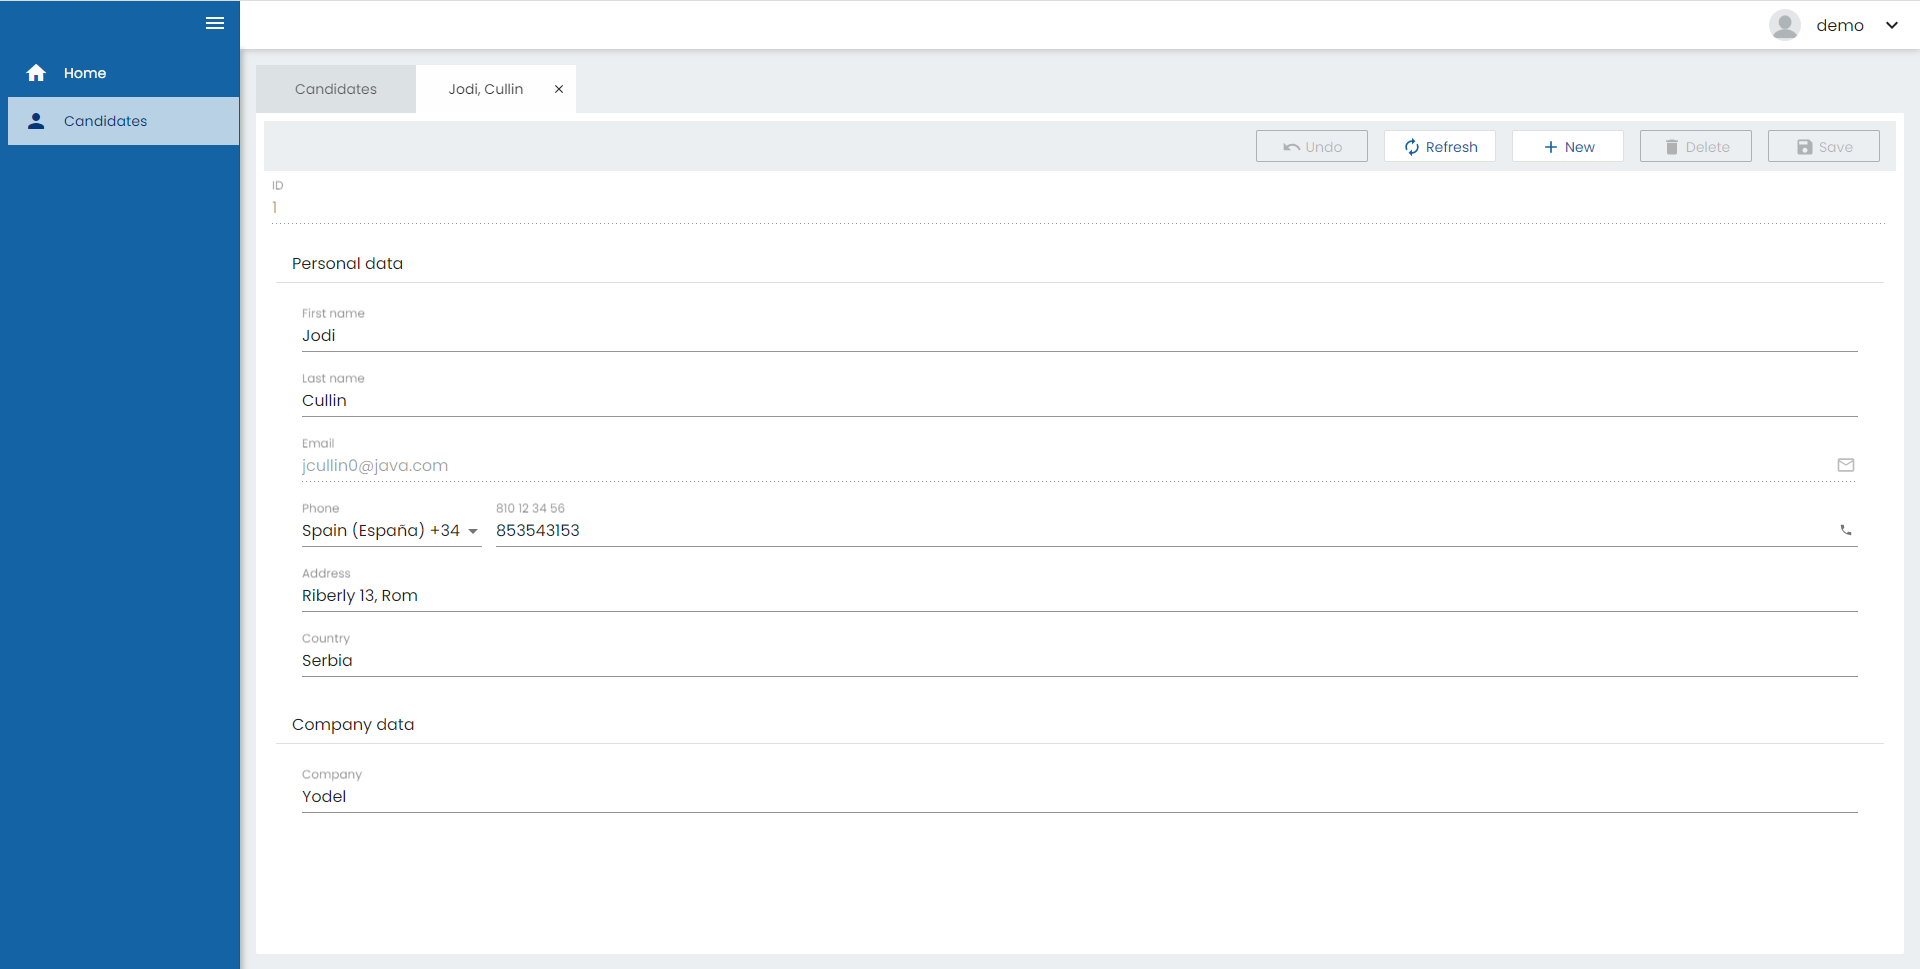
And if we click on a row to edit the registry we can see that we can’t edit the email field:
Configuring the frontend
Application configuration
First file we need to configure on our frontend it’s the app.config.ts and add permissionsServiceType and permissionsConfiguration object. In permissionsServiceType, you define the type of permission to use (OntimizeEEPermissions or OntimizePermissions, for more information see here) and permissionsConfiguration which should contain the permissions service whose path should be defined in app.services.config.ts (defined in the following code section of this page).
app.config.ts:
export const CONFIG: Config = {

...

  permissionsServiceType: 'OntimizeEEPermissions',

  permissionsConfiguration: {
    service: 'permissions'
  }

};
Then we need to define our service on the app.services.config.ts. In our application we only got two services as we can see below.
app.services.config.ts:
export const SERVICE_CONFIG: Object = {
  candidates: {
    path: "/candidates",
  },
  permissions: {
    path: "/permissions/permission",
  },
};
Route permissions
If we want to manage the routes permissions we need to define on the routing module the canActivateChild parameter and assign to it the Ontimize Web guard PermissionsGuardService.
main-routing.module.ts:
...
import { AuthGuardService, PermissionsGuardService } from 'ontimize-web-ngx';
...
export const routes: Routes = [
  {
    path: '',
    component: MainComponent,
    canActivate: [AuthGuardService],
    canActivateChild: [PermissionsGuardService],
    children: [
...
Optionally the last configuration that we can do it’s to define a redirection page to visit when the user does not have permissions to access the page requested. To configure this page you need to add the route (or use the ontimize component 403) to the restrictedPermissionsRedirect parameter on the routing module of the component or the module. Example:
candidates-routing.module.ts (component):
...
export const routes: Routes = [
  {
    path: '', component: CandidatesHomeComponent,
    data: {
      oPermission: {
        permissionId: 'candidates-table-route',
        restrictedPermissionsRedirect: '403'
      }
    }
  },
  {
    path: 'new', component: CandidatesNewComponent,
    data: {
      oPermission: {
        permissionId: 'candidates-table-route',
        restrictedPermissionsRedirect: '403'
      }
    }
  },
  {
    path: ':ID',
    component: CandidatesDetailComponent,
    data: {
      oPermission: {
        permissionId: 'candidates-table-route',
        restrictedPermissionsRedirect: '403'
      }
    }
  }
];
...
main-routing.module.ts (module):
...
export const routes: Routes = [
  {
    path: '',
    component: MainComponent,
    canActivate: [AuthGuardService],
    canActivateChild: [PermissionsGuardService],
    children: [
      { path: '', redirectTo: 'home', pathMatch: 'full' },
      {
        path: 'home', loadChildren: () => import('./home/home.module').then(m => m.HomeModule),
        data: {
          oPermission: {
            restrictedPermissionsRedirect: '403'
          }
        }
      },
      { path: 'candidates', loadChildren: () => import('./candidates/candidates.module').then(m => m.CandidatesModule) }
    ]
  }
];
...
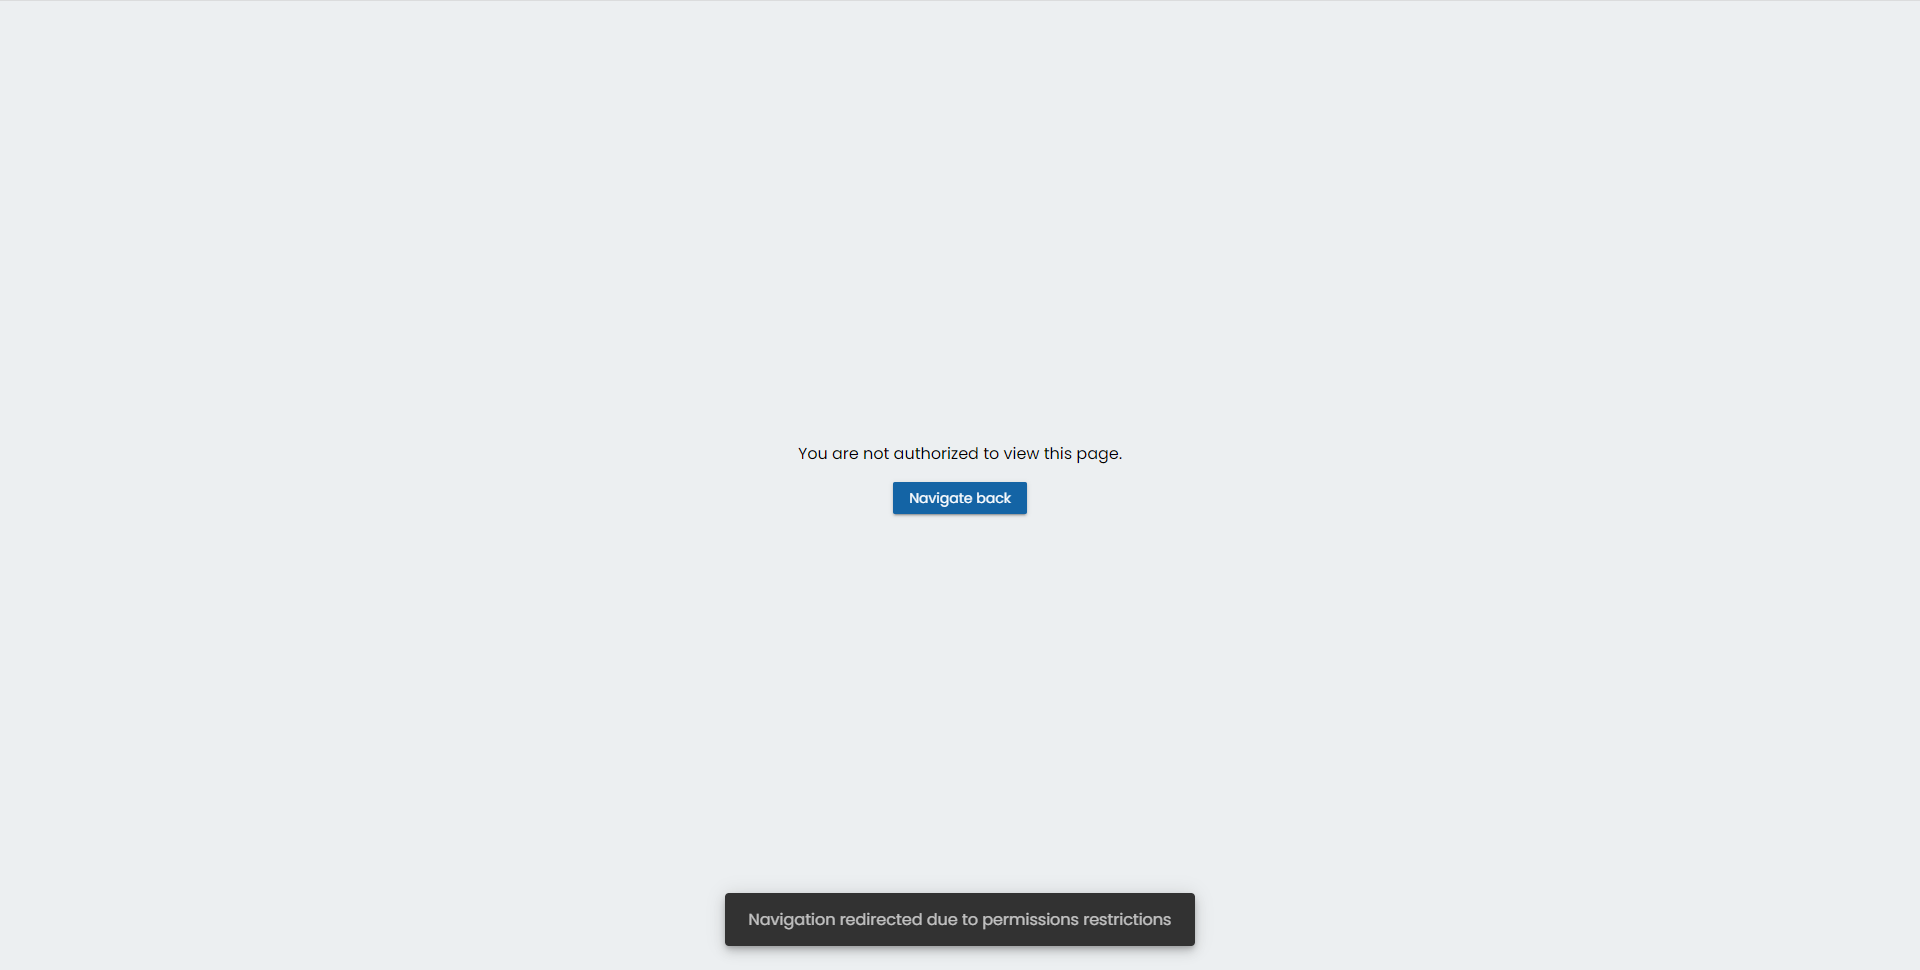
The page we will see if we try to access a page that we dont have permissions it’s going to look like this:
How to extend the permission service
In case we want to change the permission service we need to do two steps:
- Extend the
OntimizeEEPermissionsServiceor theOntimizePermissionsServiceclasses to your own service class. Example:
custom-permissions.service.ts:
...
@Injectable()
export class CustomPermissionsService extends OntimizeEEPermissionsService {

  constructor(protected injector: Injector) {
    super(injector);
  }

  loadPermissions(): Observable<any> {
    const isLoggedIn = this.authService.isLoggedIn();
    if (isLoggedIn) {
      return super.loadPermissions();
    } else {
      return this.loadPublicPermissions();
    }
  }

  loadPublicPermissions(): Observable<any> {
    const url = './assets/dummy/public-permission.json';
    const self = this;
    const dataObservable: Observable<any> = new Observable(_innerObserver => {
      self.httpClient.get(url).subscribe((res: any) => {
        let permissions = {};
        if ((res.code === Codes.ONTIMIZE_SUCCESSFUL_CODE) && Util.isDefined(res.data)) {
          const response = res.data;
          try {
            permissions = response;
          } catch (e) {
            console.warn('[CustomPermissionsService: permissions parsing failed]');
          }
        }
        _innerObserver.next(permissions);

      }, error => {
        _innerObserver.error(error);
      }, () => _innerObserver.complete());
    });
    return dataObservable.pipe(share());
  }
}
And here are the permissions loaded if the user is not logged in:
public-permission.json:
{
  "code": 0,
  "data": {
    "menu": [
      {
        "attr": "candidates",
        "visible": false,
        "enabled": false
      },
      {
        "attr": "home",
        "visible": false,
        "enabled": false
      }
    ],
    "routes": [
      {
        "permissionId": "candidates-table-route",
        "enabled": false
      },
      {
        "permissionId": "home-route",
        "enabled": false
      }
    ]
  }
}
- Add the service to your
app.module.tsfile. Example:
...
,
  providers: [
    { provide: APP_CONFIG, useValue: CONFIG },
    ONTIMIZE_PROVIDERS,
    { provide: O_PERMISSION_SERVICE, useValue: CustomPermissionsService },
    ...customProviders
  ],
})
export class AppModule { }
The last step would be to load the permissions in the component that is public PublicComponentComponent since the permissions are loaded in AuthGuardService.
It is also necessary to add an ngif to the component o-bar-menu on which we want to apply the permissions so that it is built after loading the permissions.
import { Component } from '@angular/core';
import { PermissionsService } from 'ontimize-web-ngx';


@Component({
  selector: 'app-public-component',
  templateUrl: './public-component.component.html',
  styleUrls: ['./public-component.component.scss']
})
export class PublicComponentComponent {
  hasPermission = false;
  constructor(
    private permissionService: PermissionsService
  ) {
    this.permissionService.getUserPermissionsAsPromise().then(x => this.hasPermission = true);
  }

}
<o-bar-menu *ngIf="hasPermission">
  <o-bar-menu-group title="OPTIONS">
    <o-bar-menu-group title="LANGUAGE">
      <o-locale-bar-menu-item
        locale="en"
        title="English"
      ></o-locale-bar-menu-item>
      <o-locale-bar-menu-item
        locale="es"
        title="Español"
      ></o-locale-bar-menu-item>
    </o-bar-menu-group>
  </o-bar-menu-group>
</o-bar-menu>