Export table data
Since 8.8.0 version Ontimize Web is compatible with the version Ontimize Boot 3.9.0 or above.
Compatibility between Ontimize server and Ontimize Web
Version compatibility table Ontimize server and Ontimize Web
| Ontimize server version | Ontimize Web version |
|---|---|
| Ontimize JEE | >=8.0.0 |
| Ontimize Boot 2.x.x | >=8.0.0 |
| Ontimize Boot between 3.0.0 and 3.6.0 | none |
| Ontimize Boot 3.9.0 or higher | >=8.8.0 |
Depending on the server Ontimize Web supports customization differents options and next we describe the two versions.
Ontimize JEE and Ontimize Boot 2.X.X or lower
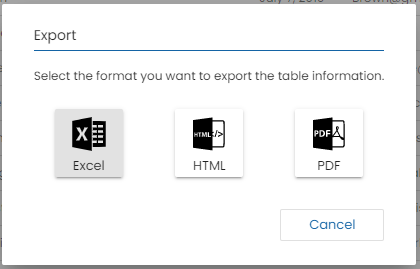
With these server versions, the o-table component is able to export its data in Excel, HTML and PDF format by default
By default, the o-table component export all data with the columns names defined in the table, the sqltypes and the filter if used, the component execute the REST(POST) export request in which an object of type OTableExportData is sent in the body.
export type OTableExportData = {
  data: any;
  columns: string[],
  columnNames: object,
  sqlTypes: { [columnId: string]: string; };
  filter: object;
}
| Attribute | Meaning |
|---|---|
| data | Export data |
| columns | An array that indicates which columns to query in the database |
| columnNames | Translates the name of the column to be exported, replacing it with the value of the key |
| sqlTypes | An object containing the key-value pairs for the data type contained in the database. As a key, the column name and as a value, the integer corresponding to the database data type, which can be found at this link. |
| filter | Un object containing the basic expression for querying |
Next a POST request example will be made to the previously configured url and the body of the request containing all the necessary information for the export.
- URL: http://localhost:8080/qsallcomponents-jee/services/rest/customers/customer/xlsx
- HTTP Method: POST
- Authorization: User: demo, Password: demouser
- Body: JSON
{
    "data": [],
    "columns": [
        "NAME",
        "SURNAME",
        "STARTDATE",
        "EMAIL",
        "ADDRESS",
        "CUSTOMERTYPEID"
    ],
    "columnNames": {
        "NAME": "Name",
        "SURNAME": "Surname",
        "STARTDATE": "Start date",
        "EMAIL": "Email",
        "ADDRESS": "Address",
        "CUSTOMERTYPEID": "Type"
    },
    "sqlTypes": {
        "SURNAME": 12,
        "EMAIL": 12,
        "CUSTOMERTYPEID": 4,
        "ADDRESS": 12,
        "NAME": 12,
        "CUSTOMERID": 4,
        "STARTDATE": 93
    },
    "filter": {
        "@basic_expression": {
            "lop": "CUSTOMERTYPEID",
            "op": "=",
            "rop": 2
        }
    }
}
The exportation process is performed as follows:
-
Firstly, OntimizeExportDataProviderService service provider collects all the required information to perform the exportation, the table data, column names, column types, filter… If you want to customize this data provider, please check the Custom data provider section.
-
Then OntimizeExportService sends this information to the server in order to generate the file that will contain the exported data. If you want to customize this service, please check the Customizing export service section.
The rest interface used for this must be like the following by default:
https://{ your-api-endpoint }/{ table-service-path }/{ table-entity }/{ format-selected }
Where format-selected can be: ‘xlsx’, ‘html’ or ‘pdf’ depending on the format selected. You can also export the table data in other format using a o-table-export-button, in this case, the format-selected will be the value configured in the attribute export-type of the o-table-export-button component.
If you want to customize this end point, please check the Custom exportation end point section.
The service must send a response with an object containing an unique identifier for the file and a key that depends on the format selected for the exportations. You can se en example of each exportation object response in the following table.
You can see an example of the exportation method end point in the following example.
@PostMapping(value = "/{extension}", consumes = MediaType.APPLICATION_JSON_VALUE, produces = MediaType.APPLICATION_JSON_VALUE)
public ResponseEntity<JSONObject> export(@PathVariable("extension") String extension) {

  // Generate xlsx file ...
  int id = generateXLSXFile();

  // Send response
  JSONObject result = new JSONObject();
  result.setInt(extension + "Id", id);
  return new ResponseEntity<>(result, HttpStatus.OK);
}
Finally, the table sends a request to the rest interface with the file identifier provided to perform the download of the file generated on the previous step. The rest interface used for downloading the file is like the following by default:
https://{ your-api-endpoint }/{ table-service-path }/{ format-selected }/{ file-id }
Where format-selected is the same as in the first request and file-id is the file identifier obtained as response of the first request.
If you want to customize the download end point, please check the Custom exportation end point section.
In the following example you can see the download api end point method.
@GetMapping(value = "/{extension}/{id}")
public void downloadFile(@PathVariable(name = "extension", required = true) final String fileExtension,
    @PathVariable(name = "id", required = true) final String fileId, HttpServletResponse response) {

  // Get the file usint the file identifier
  File file = getFile(fileId);

  // Send response
  response.setHeader("Content-Type", "application/octet-stream");
  response.setHeader("Content-Disposition", "attachment; filename=\"" + file.getName() + "\"");
  response.setContentLengthLong(file.length());
  fis = new BufferedInputStream(new FileInputStream(file));
  FileCopyUtils.copy(fis, response.getOutputStream());
}
Custom exportation end point
For customizing the exportation end points simply add your end points on the service configuration object of the table with the keys exportPath and downloadPath. Check the following example.
export const SERVICE_CONFIG = {
  users: {
    path: '/users',
    exportPath: '/usersExport',
    downloadPath: '/usersDownload'
  }
}
Using the above configuration the enpoints would be as follows:
 https://{ your-api-endpoint }/{ exportPath }/{ table-service-path }/{ table-entity }/{ format-selected }

 https://{ your-api-endpoint }/{ downloadPath }/{ table-service-path }/{ format-selected }/{ file-id }
Customizing data provider
When implementing export data, you can customize the OTableExportData object explained in the Ontimize JEE and Ontimize Boot 2.X.X or lower section for this you should:
- Extend the export service provider OntimizeExportDataProviderService and customize the table export configuration that sending REST request.
import { Injectable, Injector } from '@angular/core';
import { OntimizeExportDataProviderService
 } from 'ontimize-web-ngx';

@Injectable()
export class CustomOntimizeExportDataProviderService extends OntimizeExportDataProviderService {

  constructor(injector: Injector) {
    super(injector);
  }

  getExportConfiguration() {
    let tableExportConfiguration: any = super.getExportConfiguration();
    let selectedItems = this.table.getSelectedItems();
    if (selectedItems.length > 0) {
      tableExportConfiguration.data = this.table.getSelectedItems();
    }
    return tableExportConfiguration;
  }
}
- Add the extended service in the previous point in the app.module.ts with the injection token
O_EXPORT_DATA_SERVICE
// Defining custom providers (if needed)...
export const customProviders: any = [
 ...
  { provide: O_EXPORT_DATA_SERVICE, useValue: CustomOntimizeExportDataProviderService },
  ....
];


@NgModule({
  declarations: [AppComponent],
  imports: [
    ONTIMIZE_MODULES,
    OntimizeWebModule,
    AppRoutingModule,
    HttpClientModule,
    ServiceWorkerModule.register('ngsw-worker.js', { enabled: environment.production })
  ],
  providers: [
    { provide: APP_CONFIG, useValue: CONFIG },
    ...ONTIMIZE_PROVIDERS,
    ...customProviders
  ],
  bootstrap: [AppComponent]
})
Ontimize Boot 3.9.0 or higher
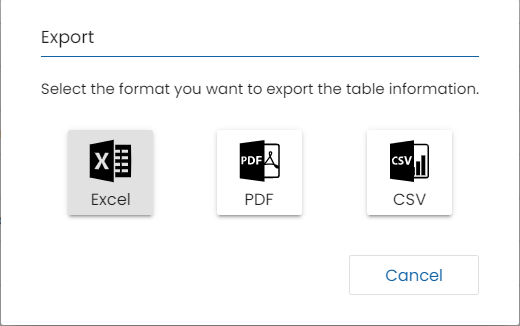
The o-table component is able to export its data in Excel, PDF and CSV format by default.
The o-table component exports all the data if the table has pageable=no configured or the page data otherwise
with the columns names defined in the table, the sqltypes and the filter if used, the component execute the REST(POST) export request in which an object of type OTableExportData3X is sent in the body in case export CSV or OTableFormattedExportData3X in case export PDF or EXCEL.
export interface OTableExportData3X {
  type: string;
  queryParam: QueryParameter | AdvancedQueryParameter;
  service?: string;
  path: string;
  dao: string;
  advQuery: boolean
}

export interface OTableFormattedExportData3X extends OTableExportData3X {
  columns: { [columnId: string]: string; };
  columnTitles: { [columnId: string]: string; };
  columnTypes: { cellNumber?: string, styleId?: string };
  styles: { styleId?: string, style?: OTableExportColumnStyle };
  columnStyles: { columnId?: string, styleId?: string };
  rowStyles: { rowId?: string, styleId?: string };
  cellStyles: { cellNumber?: string, styleId?: string };
}
For the Excel export, the styles object has an element with id “booleanCellRender” that allows to indicate the desired string for the true and false boolean values as shown in the following example.
"booleanCellRender": {
    "trueValue": "Add here the value you want as true",
    "falseValue": "Add here the value you want as false"
  }
Next a POST request will be made to the previously configured url and the body of the request containing all the necessary information for the EXCEL export.
- URL: http://localhost:8080/qsallcomponents-jee/services/rest/export/xlsx
- HTTP Method: POST
- Authorization: User: demo, Password: demouser
- Body: JSON
{
    "data": [],
    "columns": [
        "NAME",
        "SURNAME",
        "STARTDATE",
        "EMAIL",
        "ADDRESS",
        "CUSTOMERTYPEID"
    ],
    "columnNames": {
        "NAME": "Name",
        "SURNAME": "Surname",
        "STARTDATE": "Start date",
        "EMAIL": "Email",
        "ADDRESS": "Address",
        "CUSTOMERTYPEID": "Type"
    },
    "sqlTypes": {
        "SURNAME": 12,
        "EMAIL": 12,
        "CUSTOMERTYPEID": 4,
        "ADDRESS": 12,
        "NAME": 12,
        "CUSTOMERID": 4,
        "STARTDATE": 93
    },
    "filter": {
        "@basic_expression": {
            "lop": "CUSTOMERTYPEID",
            "op": "=",
            "rop": 2
        }
    }
}
The exportation process is performed as follows:
- Firstly, OntimizeExportDataProviderService3X service provider collects all the required information to perform the exportation, the column names, column types, query params, service… except cell, column and row styles .
The server allows you to customize the styles of the cells, columns or rows and if you want these additional options you can customize extending this data provider, please check the Custom data provider section.
- Then OntimizeExportServic3X sends this information to the server in order to generate the file that will contain the exported data. If you want to customize this service, please check the Customizing export service section that will contain the exported data.
The rest interface used for this must be like the following by default:
https://{ your-api-endpoint }/{ export-path }/{ format-selected }
Where format-selected can be: ‘xlsx’, ‘pdf’ or ‘csv’ depending on the format selected. You can also export the table data in other format using a table-export-button, in this case, the format-selected will be the value configured in the attribute export-type of the o-table-export-button component.
And export-path is export by default, if you want to customize this end point, please check the Custom exportation end point section.
The service must send a response with the generated file.
You need to configure your backend server and you can consult the documentation in this link
Custom exportation end point
For using the exportation with Ontimize Boot 3.7.0 version or above server, the exportConfiguration configuration object must contain the service path.
app.config.ts
{
 ...
 exportConfiguration: {
    path:'/customExport'
 }
 ...
};
Using the above configuration the enpoint would be as follows:
http://{ your-api-endpoint }/customExport/{ format-selected }
Customizing data provider
Implementing the export data, you can customize differents options such as columns, column names, query filter, and column types. Ontimize Web allows to replace with the provider defined with the corresponding injection token O_EXPORT_DATA and in this way customize the data to be sent to the rest api of the export service
The following example extends the provider by taking into account the marked rows in a table
- Extend the export service provider OntimizeExportDataProviderService and customize the table export configuration that sending REST request.
import { Injectable, Injector } from '@angular/core';
import { OntimizeExportDataProviderService, OTableExportData3X } from 'ontimize-web-ngx';

@Injectable()
export class CustomOntimizeExportDataProviderService extends OntimizeExportDataProviderService3X {

  constructor(injector: Injector) {
    super(injector);
  }

  getExportConfiguration() {
    let tableExportConfiguration: OTableExportData3X = super.getExportConfiguration();
    let selectedItems = this.table.getSelectedItems();
    if (selectedItems.length > 0) {
      tableExportConfiguration.data = this.table.getSelectedItems();
    }
    return tableExportConfiguration;
  }
}
- Add the extended service in the previous point in the app.module.ts with the injection token
O_EXPORT_DATA_SERVICE.
// Defining custom providers (if needed)...
export const customProviders: any = [
 ...
  { provide: O_EXPORT_DATA_SERVICE, useValue: CustomOntimizeExportDataProviderService },
  ....
];


@NgModule({
  declarations: [AppComponent],
  imports: [
    ONTIMIZE_MODULES,
    OntimizeWebModule,
    AppRoutingModule,
    HttpClientModule,
    ServiceWorkerModule.register('ngsw-worker.js', { enabled: environment.production })
  ],
  providers: [
    { provide: APP_CONFIG, useValue: CONFIG },
    ...ONTIMIZE_PROVIDERS,
    ...customProviders
  ],
  bootstrap: [AppComponent]
})
The following example extends the provider by taking into account the marked rows in a table and nd sets the background to green in the first row.
app.module.ts
export const customProviders: any = [
 { provide: O_EXPORT_DATA_SERVICE, useValue: CustomOntimizeExportDataProviderService },
...
];
import { Injectable, Injector } from '@angular/core';
import { OntimizeExportDataProviderService3X} from 'ontimize-web-ngx';

@Injectable()
export class CustomOntimizeExportDataProviderService extends OntimizeExportDataProviderService3X {

  constructor(injector: Injector) {
    super(injector);
  }

  getExportConfiguration() {
    let exportData: any = super.getExportConfiguration();
    let selectedItems = this.table.getSelectedItems();
    if (selectedItems.length > 0) {
      exportData.data = this.table.getSelectedItems();
    }
    exportData.styles = {
      "greenBG": {
        "fillBackgroundColor": "GREEN"
      },
      "booleanCellRender": {
        "trueValue": "Add here the value you want as true",
        "falseValue": "Add here the value you want as false"
      }
    };
    exportData.rowStyles = {
      "1": "greenBG"
    };

    return exportData;
  }
}
Customizing export service
Customizing export service in the whole application
By default, Ontimize Web use the service OntimizeExportService or OntimizeExportService3X in the whole application depending the Ontimize server version already explained in the section Compatibility between Ontimize server and Ontimize Web but the framework allows to modify the export service used by setting the property exportServiceType in app.config.ts or with service defining with the corresponding injection token O_EXPORT_SERVICE
| Ontimize server | Service | Injection token | Description |
|---|---|---|---|
| Ontimize EE, Ontimize Boot 2.X.X or lower version | OntimizeExportService |
O_EXPORT_SERVICE |
Service used by the o-table component for exporting its data |
| Ontimize Boot 3.9.0 or higher | OntimizeExportService3X |
O_EXPORT_SERVICE |
Service used by the o-table component for exporting its data |
Setting the property `exportServiceType` in `app.config.ts`
...
export const CONFIG: Config = {
  // The base path of the URL used by app services.
  apiEndpoint:environment.apiEndpoint,

  ...
  exportServiceType: ExportServiceExtService //Ontimize EE, Ontimize Boot 2.X.X or lower version
  or
  exportServiceType: ExportServiceExtService3X //Ontimize Boot 3.9.0 or higher
  ...
Service defining with the `O_EXPORT_SERVICE` injection token
// Defining custom providers (if needed)...
export const customProviders: any = [
  ...
  { provide: O_EXPORT_SERVICE, useValue: ExportServiceExtService } //Ontimize EE, Ontimize Boot 2.X.X or lower version
  or
  { provide: O_EXPORT_SERVICE, useValue: ExportServiceExtService3X } //Ontimize Boot 3.9.0 or higher
  ...
];


@NgModule({
  declarations: [AppComponent],
  imports: [
    ONTIMIZE_MODULES,
    OntimizeWebModule,
    AppRoutingModule,
    HttpClientModule,
    ServiceWorkerModule.register('ngsw-worker.js', { enabled: environment.production })
  ],
  providers: [
    { provide: APP_CONFIG, useValue: CONFIG },
    ...ONTIMIZE_PROVIDERS,
    ...customProviders
  ],
  bootstrap: [AppComponent]
})

export class AppModule { }
Export service example for Ontimize EE, Ontimize Boot 2.X.X or lower version
import { Injectable, Injector } from '@angular/core';
import { HttpRequestOptions, Observable, OntimizeExportService, ServiceResponse } from 'ontimize-web-ngx';
import { Subscriber } from 'rxjs';
import { map, share } from 'rxjs/operators';

@Injectable()
export class ExportServiceExtService extends OntimizeExportService {

   constructor(injector: Injector) {
     super(injector)
   }
   public exportData(format: string): Observable<any> {
     const entity = this.exportDataProvider.entity;
     const url = `${this.urlBase}${this.exportPath ? this.exportPath : ''}${this.servicePath}/${entity}/${format}`;

     const options: HttpRequestOptions = {
       headers: this.buildHeaders().append('Content-Type', 'application/json;charset=UTF-8'),
       observe: 'response'
     };


     const exportData: any = this.exportDataProvider.getExportConfiguration();
     exportData.data = this.exportDataProvider.table.getSelectedItems();
     const body = JSON.stringify(exportData);
     const dataObservable: Observable<ServiceResponse> = new Observable((observer: Subscriber<ServiceResponse>) => {
       this.httpClient.post<ServiceResponse>(url, body, options).pipe(
         map((resData: any) => this.adapter.adapt(resData))
       ).subscribe(resp => {
         this.parseSuccessfulExportDataResponse(format, resp, observer);
       }, error => {
         this.parseUnsuccessfulResponse(error, observer);
       });
     });
     return dataObservable.pipe(share());
   }
 }
Export service example for Ontimize Boot 3.9.0 or higher
import { Injectable, Injector } from '@angular/core';
import { HttpRequestOptions, Observable, OntimizeExportService3X } from 'ontimize-web-ngx';
import { share } from 'rxjs/operators';

@Injectable()
export class ExportServiceExtService3X extends OntimizeExportService3X {

   constructor(injector: Injector) {
     super(injector)
   }
   public exportData(format: string): Observable<any> {
     const url = `${this.urlBase}${this.exportPath}/${format}`;

     const options: HttpRequestOptions = {
       headers: this.buildHeaders().append('Content-Type', 'application/json;charset=UTF-8'),
       observe: 'response',
       responseType: 'blob'
     };


     let exportData: any = this.exportDataProvider.getExportConfiguration();
     exportData.path = this.servicePath;

     const body = JSON.stringify(exportData);
     const dataObservable = new Observable(observer => {
       this.httpClient.post(url, body, options).subscribe(
         (resp: any) => {
           const fileData = resp.body;
           const contentDisposition = resp.headers.get('content-disposition');
           let fileName = 'file.' + format;
           const fileNameRegex = /filename[^;=\n]*=((['"]).*?\2|[^;\n]*)/;
           const matches = fileNameRegex.exec(contentDisposition);
           if (matches != null && matches[1]) {
             fileName = matches[1].replace(/['"]/g, '');
           }
           const fileURL = URL.createObjectURL(fileData);
           const a = document.createElement('a');
           document.body.appendChild(a);
           a.href = fileURL;
           a.download = fileName;
           a.click();
           document.body.removeChild(a);
           observer.next(fileData);
           URL.revokeObjectURL(fileURL);
         }, error => observer.error(error),
         () => observer.complete()
       );
     });
     return dataObservable.pipe(share());
   }
Customizing export service for a specific table
In addition, it is possible to configure the use of an export service for a specific table with the export-service-type input in o-table component with service defining in the app.module.ts file.
....

// Defining custom providers (if needed)...
export const customProviders: any = [
...
  { provide: ExportServiceExtService},
...
];


@NgModule({
  declarations: [AppComponent],
  imports: [
    ONTIMIZE_MODULES,
    OntimizeWebModule,
    AppRoutingModule,
    HttpClientModule,
    ServiceWorkerModule.register('ngsw-worker.js', { enabled: environment.production })
  ],
  providers: [
    { provide: APP_CONFIG, useValue: CONFIG },
    ...ONTIMIZE_PROVIDERS,
    ...customProviders
  ],
  bootstrap: [AppComponent]
})

export class AppModule { }
Modify o-table component
<o-table attr="table" export-service-type="ExportServiceExtService" ... >
      ...
</o-table>