Deploy your application
This section describes how to build the production version of your application and deploy it to a remote server.
Simplest deployment possible
The simplest way of deploying your application is to build the development version of the application and copy the output directory to a web server.
- Build the development version of the application by running the following command:
npm run productionThis command triggers the
productionscript defined in the package.json file of your application (ng build --aot=false --target -prod). -
Copy everything within the output folder (dist by default) to a folder on the server.
-
If you copy the files into a server sub-folder, modify the
productionscript in the package.json and append the build flag,--base-hrefand set the<base href>appropriately. - Configure the web server to redirect request for missing files to
index.html. You can reed more about this topic in the Angular docs.
NOTE: This is not a production deployment. It’s not optimized and it won’t be fast for users. It might be good enough for sharing your progress and ideas internally with managers, teammates, and other stakeholders.
Optimize for production
Although deploying directly from the development environment works, you can generate an optimized build by running the following command
npm run production-aot
This command triggers the production-aot script defined in the package.json file of your application (ontimize-web-ngx production-aot --href /my-app/).
The remaining copy deployment steps are the same as before.
Simple deployment vs. Optimized deployment
Comparision of the load time for the OntimizeWeb Playground.
-
Simple deployment:

-
Optimized deployment:

How to wrap an Angular app with Apache Cordova
Once you have the production version of your application you can deploy it on a web server or to create cross platform applications using Apache Cordova.
After wrapping your application with Apache Cordova, check you has accoplished the installation and configuration requirements here.
Follow the next steps:
Create a Apache Cordova project
Execute the following command in the root directory of your application.
#  cordova create <folder-name> <project-id> <application-name>
   cordova create quickstart com.ontimize.quickstart Quickstart
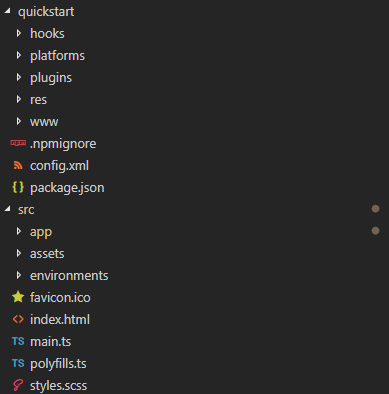
This command generates a new Apache Cordova project in the indicated folder (folder-name) with the follogin structure.
Copy the application to the Apache Cordova project
Copy all files withing the output folder of your application to the www folder of your Cordova project.
Alternatively, you can modify the production script in the package.json file and add the --output-path option in order to indicate the directory where the output files must be placed. The base-href option should be set to ., this is due to Apache Cordova does not manage absolute paths inside Cordova projects. See the example below.
"production": "ng build --aot=false --target -prod --base-href . --output-path ./quickstart/www/",
Include the Apache Cordova script in your application
Add the cordova.js script to the index.html in the www directory of your Apache Cordova project.
<script type=”text/javascript” src=”cordova.js”></script>
Set the default URL
Update the <base href="./"> tag in the index.html file in the www directory of your Apache Cordova project, this will allow angular to access files in the directory since we are not hosting the Apache Cordova application in a web server.
Example of the index.html file in the www folder of your Apache Cordova project:
<!doctype html>
<html>

<head>
  <meta charset="utf-8">
  <title>Ontimize Web QuickStart Mobile</title>
  <base href="./">
  <link rel="icon" type="image/x-icon" href="favicon.ico">
  <meta name="viewport" content="width=device-width,initial-scale=1"><!-- Styling -->
  <link rel="stylesheet" type="text/css" href="https://fonts.googleapis.com/icon?family=Material+Icons">
  <link rel="stylesheet" type="text/css" href="./assets/css/loader.css">
  <link href="styles.de9f568b16ee62eeb779.bundle.css" rel="stylesheet" />
</head>

<body>
  <!-- Loader -->
  <div id="loader-wrapper">
    <div id="loader"></div>
    <div class="loader-section section-left"></div>
    <div class="loader-section section-right"></div>
  </div><!-- The application tag-->
  <o-app></o-app>
  <script type="text/javascript" src="cordova.js"></script>
  <script type="text/javascript" src="inline.31e1fb380eb7cf3d75b1.bundle.js"></script>
  <script type="text/javascript" src="polyfills.8d96731025f12dcf8d3a.bundle.js"></script>
  <script type="text/javascript" src="scripts.0fe600f814a712347d11.bundle.js"></script>
  <script type="text/javascript" src="vendor.57801ae0a69d17753098.bundle.js"></script>
  <script type="text/javascript" src="main.eb4fb14e75e55fce24bd.bundle.js"></script>
</body>

</html>
Add a platform to your project
Add a platform to your Apache Cordova project by executing the following command.
cordova platform add android|ios|windows
Build and run your application
Run the following command to build the Apache Cordova project. You can limit the scope of the build to a specific platform.
cordova build [android|ios|windows]
Run the following command to laumch you Apache Cordova project in a emulator or in a device attached to your computer. Again, you can limit the scope of the run to a specific platform.
cordova run [android|ios|windows]
PWA
To set up the Angular service worker in your project you need to follow next actions:
- Adds the
@angular/service-workerpackage to your project.
...
"dependencies": {
  ...
    "@angular/service-worker": "6.1.10",
    ...
  },
...
- Enables service worker build support in the CLI.
ng set apps.0.serviceWorker = true
//angular.json
{
  ...
  apps:[{
    ...
    "configurations": {
      "production": {
      ...
      "serviceWorker":true,
      ...
      }
  }]
}
- Imports and registers the service worker in the app module.
...
import { environment } from '../environments/environment';
import { ServiceWorkerModule } from '@angular/service-worker';
...

@NgModule({
  imports: [
   ...
    ServiceWorkerModule.register('ngsw-worker.js', {enabled: environment.production })
    ...
  ],
 ...
})
-
Updates the index.html file:
- Create manifest.json file (see The Web App Manifest)
{ "name": "Quickstart PWA App", "short_name": "Quickstart", "orientation": "landscape", "display": "standalone", "start_url": "index.html", "description": "Quickstart app", "background_color": "#ccd5dd", "theme_color": "#242424" "icons": [ { "src": "icon_512x512.49b7c1068a3e823cafbbc93ee668cf90.png", "sizes": "512x512", "type": "image/png" }, { "src": "icon_256x256.5a33e6d514a214bd3c74a51b03915a29.png", "sizes": "256x256", "type": "image/png" }, { "src": "icon_192x192.b88c6ddd5e997a970106e207280f070a.png", "sizes": "192x192", "type": "image/png" }, { "src": "icon_128x128.e9d5cec6eb4af6cd09ba54d51342e1d0.png", "sizes": "128x128", "type": "image/png" }, { "src": "icon_96x96.3026e7eece02b69b3552da7513d93622.png", "sizes": "96x96", "type": "image/png" }, { "src": "icon_48x48.18f2efa3931f72b4c806607131ddca7b.png", "sizes": "48x48", "type": "image/png" } ] }- Includes a link to add the
manifest.jsonfile.
<!doctype html> <html style="overflow: auto"> <head> .... <!-- PWA --> <link rel="manifest" href="./manifest.json"> ... </head> ...- Adds meta tags for theme-color.
<!doctype html> <html style="overflow: auto"> <head> .... <meta name="theme-color" content="#242424"> ... </head> ... -
Adds the
webpack-pwa-manifestpackage to your project.
  ...
  "devDependencies": {
    ...
    "webpack-pwa-manifest": "4.0.0"
      ...
    },
  ...
- Adds configuration webpack plugin webpack-aot.config
...
var GlobCopyWebpackPlugin = require("copy-webpack-plugin");
var WebpackPwaManifest = require('webpack-pwa-manifest');

...
var webpack = require('webpack');
var path = require('path');

module.exports = {
  ...
  plugins: [

    new GlobCopyWebpackPlugin([
    ...
      { from: "src/manifest.json", to: "./" },
      { from: "src/manifest-mobile.json", to: "./"},
    ...
    ]),

  ....

    new WebpackPwaManifest({
      name: "Quickstart Quickstart App",
      short_name: "Ibercisa",
      description: "Quickstart app",
      background_color: "#ccd5dd",
      theme_color: "#242424",
      display: "standalone",
      orientation: "landscape",
      start_url: "index.html",
      icons: [
        {
          src: path.resolve('src/assets/icons/logo.png'),
          sizes: [48, 96, 128, 192, 256, 512]
        }
      ]
    }),

    ...
  ]
};
- Updates
index.ejs``` <!doctype html>
* Installs icon files to support the installed Progressive Web App (PWA).

* Creates the service worker configuration file called `ngsw-config.json`, which specifies the caching behaviors and other settings.(see [Service worker configuration](https://v6.angular.io/guide/service-worker-config){:target='_blank'})

ngsw-config.json

```bash
  {
  "index": "/index.html",
  "assetGroups": [{
    "name": "app",
    "installMode": "prefetch",
    "resources": {
      "files": [
        "/favicon.ico",
        "/index.html",
        "/ngsw-worker.js",
        "/*.bundle.css",
        "/*.bundle.js",
        "/*.chunk.js"
      ]
    }
  }, {
    "name": "assets",
    "installMode": "lazy",
    "updateMode": "prefetch",
    "resources": {
      "files": [
        "/assets/**",
        "/logo.png",
        "/*.png"
      ],
      "urls": [
        "https://fonts.googleapis.com/**"
      ]
    }
  }]
}
- Adds service worker to dist folder
package.json
...
 "scripts": {
   ...
    "production-aot-server": "ontimize-web-ngx production-aot --project-name quickstart --baseHref /quickstart/pwa/",
    "build-ngsw": "npm run build-ngsw-config && node cp-ngsw-dist.js",
    "build-ngsw-config": "node_modules/.bin/ngsw-config dist src/ngsw-config.json /quickstart/pwa"
    ...
    },
  ...
   "dependencies": {
    ...
    "file-system": "2.2.2"
    ...
   }
The ngsw-worker.js file is the name of the service worker precompiled script, which the CLI copies to the dist folder to deploy the server.
cp-sw-dist.js
var fs = require('fs');

fs.createReadStream('node_modules/@angular/service-worker/ngsw-worker.js').pipe(fs.createWriteStream('dist/ngsw-worker.js'));

/*  Use with node version >= 8.5

fs.copyFile('node_modules/@angular/service-worker/ngsw-worker.js', 'dist/ngsw-worker.js', (err) => {
    if(err) throw err;
    console.log('Copy SW in dist directory');
});

*/
- Serve your application with node server
You can now serve you application to check that everything is working fine. To do this we will use lite-server npm package.(see npm lite-server)
So, the process will be:
- npm run production-aot-server
- cd dist/
- lite-server
This will create a local server where you can check the application.
*Notice: If you are using ´baseHref´ or ´href´ flag with a multilevel route, liteserver will fail. So, you have to use only one level in the definition of the script in your package.json
Use
"production-aot-server": "ontimize-web-ngx production-aot --project-name quickstart --baseHref /quickstart/",
Instead of
"production-aot-server": "ontimize-web-ngx production-aot --project-name quickstart --baseHref /quickstart/pwa/",